
- 4.9M
- 104.5K
- 6.9K
- 0%
Replacing a radiator can be a daunting task, especially for those who are new to car maintenance. However, with the right tools and some basic knowledge, it can be a relatively straightforward process. In this article, we will walk you through the steps involved in replacing a radiator, including the removal of old radiator hoses, thermostat, water pump, and coolant.
Understanding the Importance of a Radiator Replacement
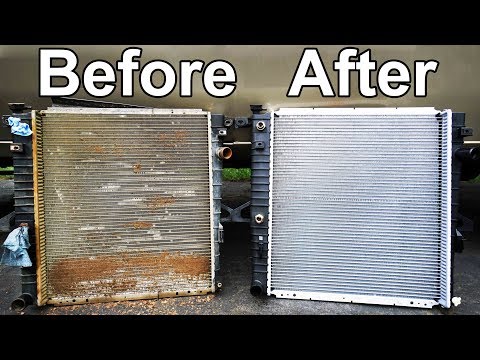
A radiator is a critical component of your vehicle's cooling system, responsible for dissipating heat from the engine. Over time, radiators can become damaged or corroded, leading to leaks and reduced cooling efficiency. If left unchecked, a faulty radiator can cause serious engine damage and even lead to costly repairs.
Gathering the Necessary Tools and Materials
Before starting the replacement process, it's essential to gather the necessary tools and materials. These include:
A new radiator
Radiator hoses
Thermostat
Water pump
Coolant
No-spill funnel
Flare-nut wrenches
Hose clamps
Removing the Old Radiator
The first step in replacing a radiator is to remove the old one. This involves disconnecting the radiator hoses, thermostat, and water pump. Start by locating the radiator hoses and disconnecting them from the radiator. Use a flare-nut wrench to loosen the hose clamps, then carefully pull the hoses off the radiator.
Next, locate the thermostat and water pump and disconnect them from the radiator. Be careful not to damage the threads or other components.
Removing the Old Coolant
Once the radiator is removed, it's essential to drain the old coolant. This can be done using a no-spill funnel and a drain pan. Be sure to dispose of the old coolant responsibly.
Installing the New Radiator
With the old radiator removed and the old coolant drained, it's time to install the new radiator. Start by connecting the radiator hoses to the new radiator. Use a flare-nut wrench to tighten the hose clamps, making sure they are secure.
Next, connect the thermostat and water pump to the new radiator. Be sure to follow the manufacturer's instructions for proper installation.
Replenishing the Coolant
Once the new radiator is installed, it's essential to replenish the coolant. Use a no-spill funnel to pour in the new coolant, following the manufacturer's recommendations for the correct type and amount.
Testing the Cooling System
After the new radiator is installed and the coolant is replenished, it's essential to test the cooling system. Start the engine and let it run for a few minutes to circulate the coolant. Check for any leaks or signs of damage.
Conclusion and Final Verdict
Replacing a radiator can be a challenging task, but with the right tools and some basic knowledge, it can be a relatively straightforward process. By following the steps outlined in this article, you can ensure a leak-free cooling system and avoid costly repairs down the line. Remember to always follow the manufacturer's instructions and take necessary safety precautions when working with tools and equipment.
Alternate Products
CarQuest LIFETIME warranty Radiator : A high-quality radiator designed to provide optimal cooling performance.
Hose Clamps : A set of durable hose clamps designed to ensure secure connections.
Radiator Hoses : A set of high-quality radiator hoses designed to provide optimal cooling performance.
No Spill Funnel : A no-spill funnel designed to make draining and refilling the coolant a breeze.
Flare-nut Wrenches : A set of durable flare-nut wrenches designed to make removing and installing radiator hoses a breeze.